DRAUGHT PROOFING DOORS

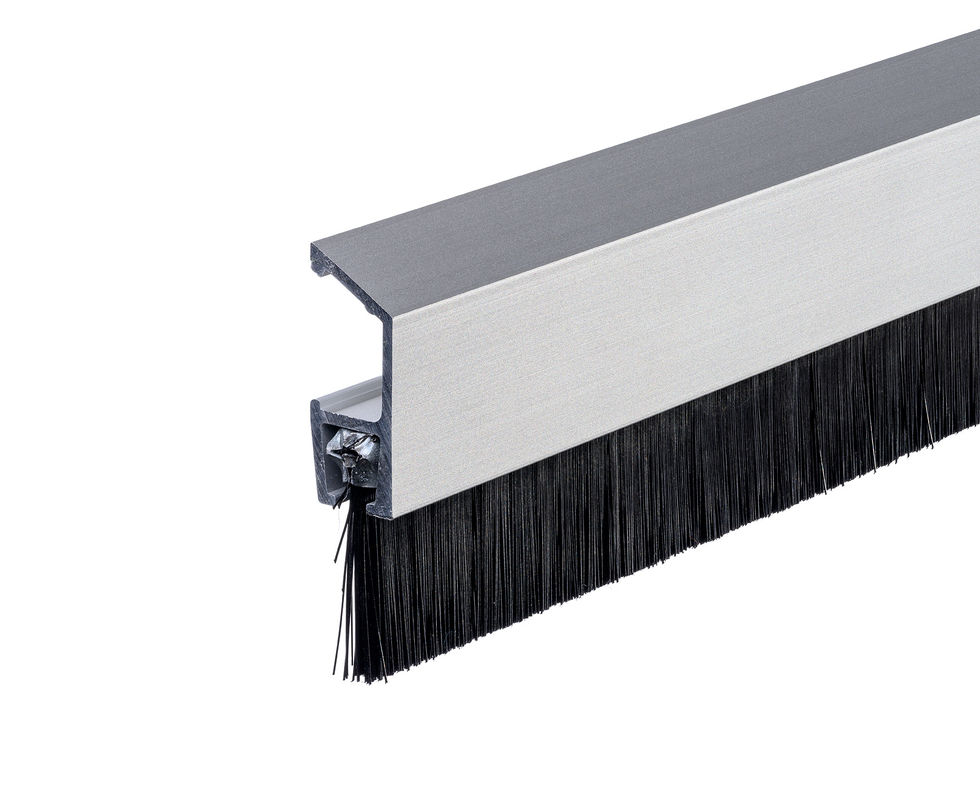
Aluminium door bottom seal with hard brush for interior doors and sliding doors. The door bottom seal is ideal for 'threshold-free' houses with floors without a threshold.
The IDS B De Luxe has a stylish finish thanks to the end caps and the possibility to mount the profile 'invisibly', in other words: the screws are not visible.
Description
- Aluminium profile
- Hard PP brush
- End caps included
- For 'invisible' mounting
- Draught proofing
- Application: interior and sliding doors
- For floors without a treshold
- Clickable cover over 'click blocks'
- Can be cut to length
Technical details
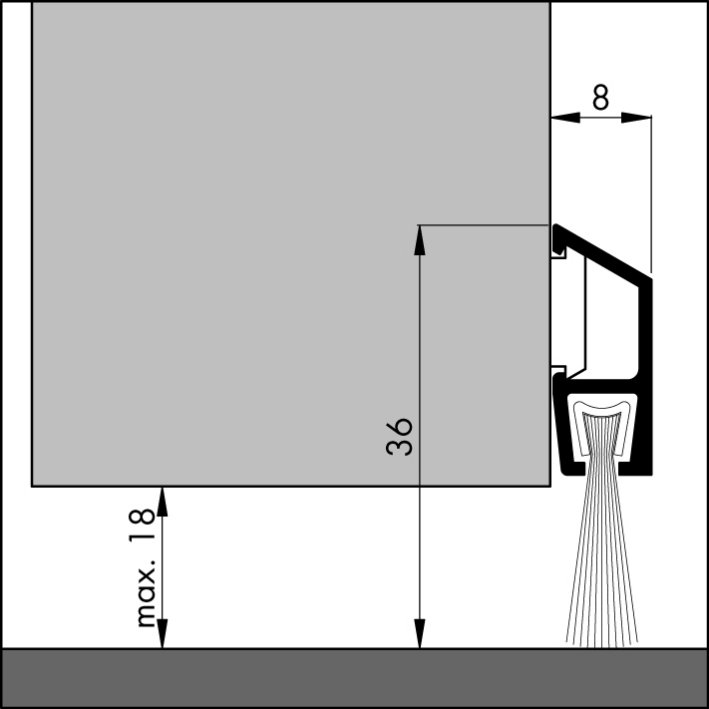
- Max gap: 18 mm
- Width x height: 8 mm x 36 mm
- Standard length: 100 cm
- Screws included
Specifications
All standard lengths can be cut to size
| LENGTH | ART.NR | COLOUR | EAN (PC) | UNIT |
| 100 cm | 041950050 | Zilver | 8711286860418 | 6 pc. |
Note: It is possible to purchase the product individually at your local hardware store or home improvement center.
Installation advice
To ensure the door bottom seal functions properly, it is important to install it correctly. Please read the included mounting instructions and follow the step-by-step guide.
Prepare the necessary materials in advance:
- Tape measure or folding ruler
- Pencil
- Hacksaw and file
- Drill with a Phillips bit
Step-by-step guide: installing door bottom seal IDS B De Luxe
- Measure the width of the door to determine the length of the door bottom seal
- Mark the correct length on the door bottom seal
- Cut the profile to size
- File off any burrs that may have formed on the aluminium
- Place the profile on the bottom of the door, with the brush covering the gap between door and floor
- Determine the 'middle' of the profile at both ends and connect these two points with a light pencil line
- Screw the supplied click blocks onto the line, evenly distributed over the door. Place a small ring between the click block and the door.
- Click the profile onto the click blocks
- Place the end caps on the ends
Related products


